Purpose
Dell Data Wipe is a feature in Dell Enterprise Client BIOS that gives users the ability to wipe the internal storage of computers. This document will serve as a guide on how to use Dell Data Wipe to remove all data on your device for redeployment or for repurpose.
Process
Dell Data Wipe process:
1. Restart your device and press F2 to enter the bios settings
2. Enable ‘Data Wipe on Next Boot’ by navigating to Security > Data Wipe. Note you will be prompted twice for confirmation when this is selected.
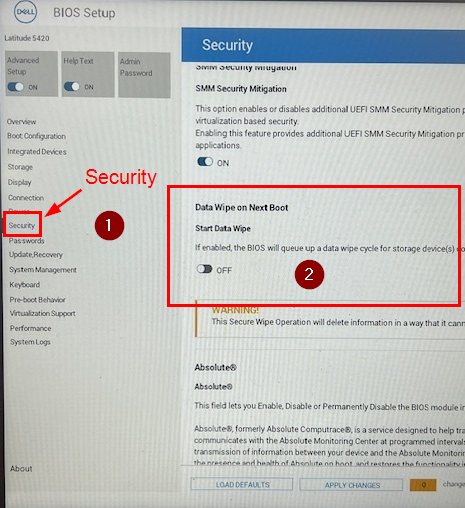
3. Select apply changes on the bottom of the page and exit out
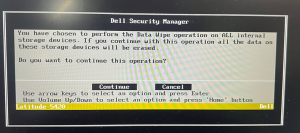
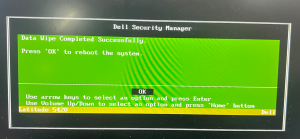
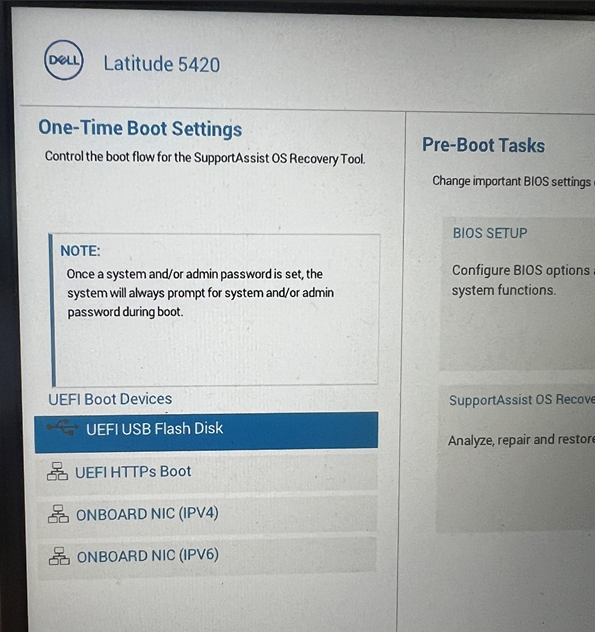
4. When loading back up your computer will once again prompt you for a data wipe. Confirm your choices and a green dialog box will appear upon successful completion. Select OK to restart your device, plug in your USB and select F12 on the Dell splash screen to enter the one time boot up page.
Restoring Windows with a USB:
5. Select the USB Flash Disk option and wait.
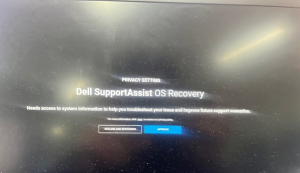
6. Download Dell SupportAssist OS Recovery
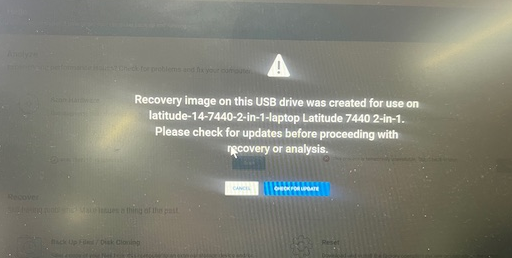
7. You may get an error stating your USB drive was created for use on a different laptop, you can simply press cancel
8. Select ‘Start Reset’

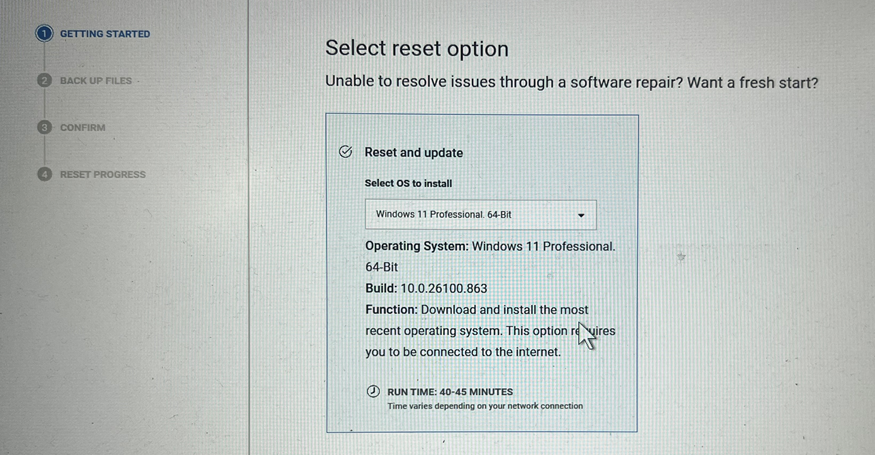
9. Select which OS to install and ensure a power adapter is plugged in
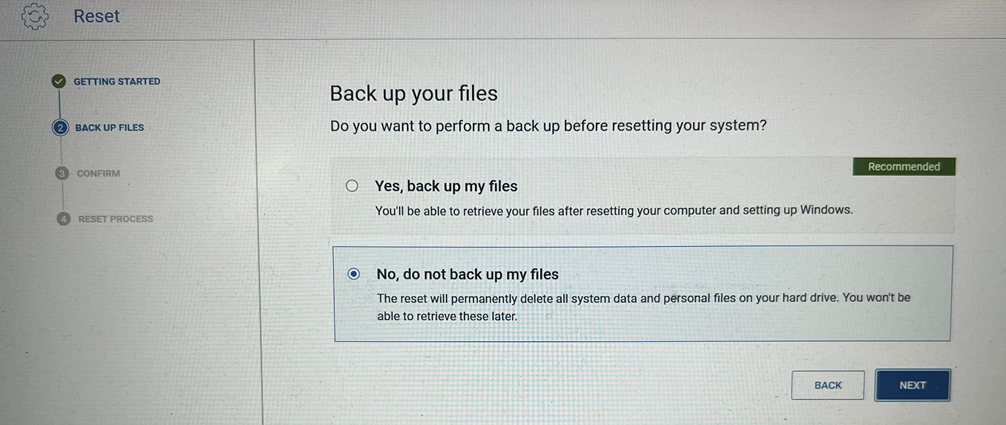
10. Select if you would like to back up your files or not and confirm your choice
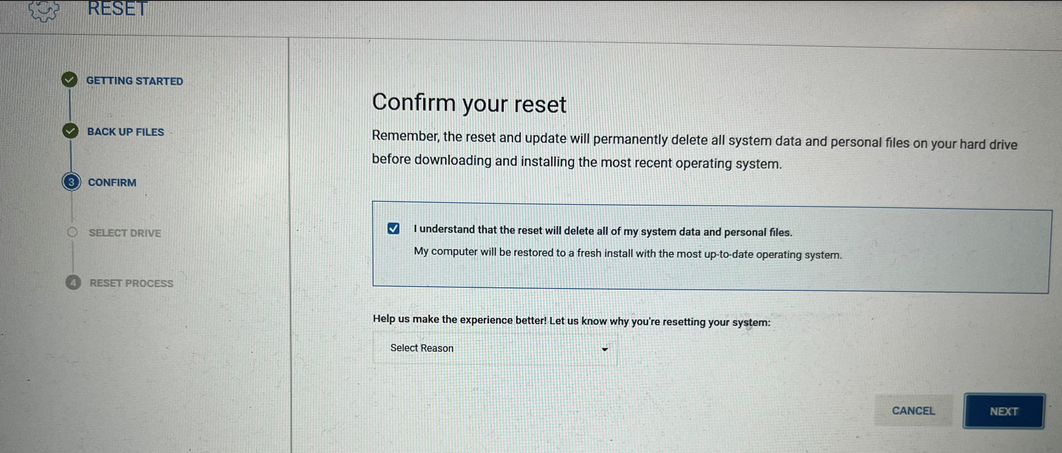
11. Confirm the reset
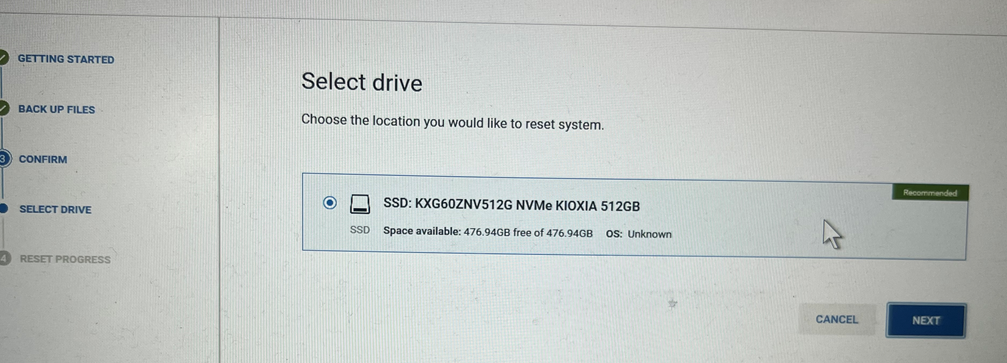
12. Select which driver you would like to reset the system in. If you get an error message for failed verification repeat steps 8 – 12
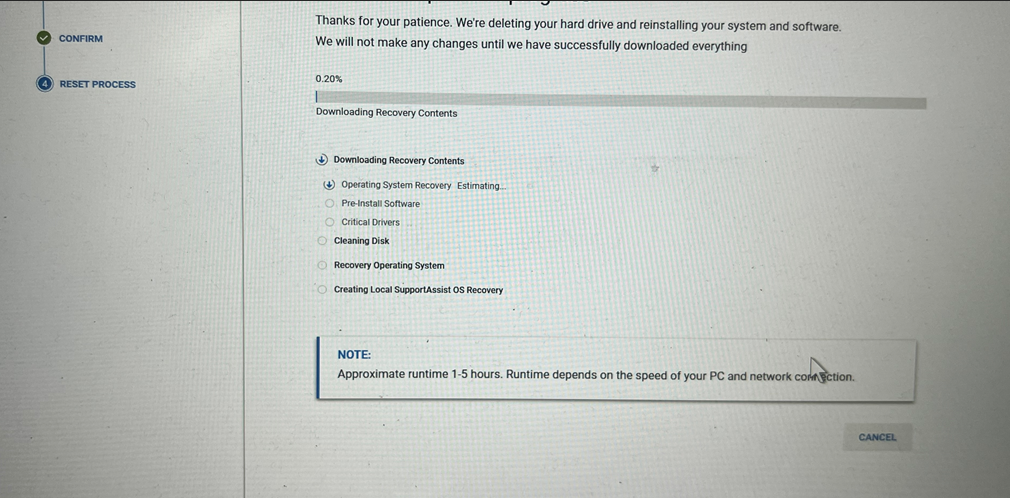
13. Wait for reset to complete
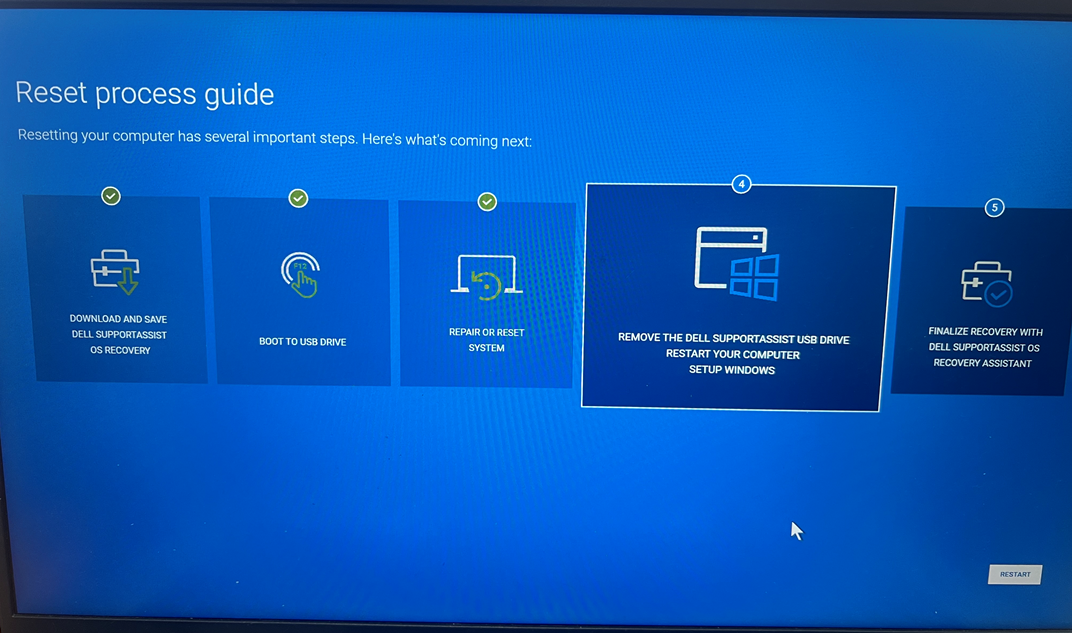
14. Once your computer is booted up a process guide will appear. Remove the USB from your device and press restart
15. Your computer will begin reinstalling the remaining files. Once complete you can begin computer setup as per normal